はじめに
WordPressを利用しているホームページのデザインや構成等、カスタマイズを行い場合、自由に変更が行える開発・検証環境がほしいと思ったことはないでしょうか。
本記事では、Raspberry Piを使用して、開発・検証用WordPressサーバを構築する方法について記載いたします。
環境
- ボード
Raspberry Pi 4 Model B - OS
Raspberry Pi OS with desktop
Release date: January 11th 2021
Kernel version: 5.4
WordPressサーバの動作環境
WordPressは、Webサーバ(HTTPサーバ)、データベース管理システム、およびPHPスクリプト言語を組み合わせて動作します。本記事では動作環境として、以下を使用します。
- Webサーバ(サポート:Apache HTTPD 2.4.x、nginx 1.19.x / 1.18.x)
Apache Webサーバ(Version:2.4.38 (Raspbian))
php-fpm - PHPスクリプト(サポート:PHP 7.4.x PHP 7.3.x PHP 7.2.x)
PHP(Version: 7.4.15) - データベース管理システム(サポート:MariaDB 10.4.x / 10.3.x / 10.2.x / 10.1.x)
MariaDBデータベースサーバ(Version:10.3.27)
Raspberry Piの初期セットアップ
はじめに、Raspberry Pi(Raspberry Pi OS)の初期セットアップを行います。
パッケージの更新
インストールされている各種パッケージを更新し、Raspberry Pi OSを最新の状態にします。
pi@raspberrypi:~ $ sudo apt update
pi@raspberrypi:~ $ sudo apt upgrade
pi@raspberrypi:~ $
パッケージの更新が完了したら、Raspberry Piを最新の状態で起動するため、再起動を行います。
pi@raspberrypi:~ $ sudo rebootタイムゾーン及びロケールの設定
次に、raspi-configコマンド使用して、タイムゾーン及びロケールの変更を行います。
pi@raspberrypi:~ $ sudo raspi-config
pi@raspberrypi:~ $
ロケールを変更します。
- raspi-configのトップ画面で、「5 Localisation Options」を選択し、「<Select>」を選択します。
- 「L1 Locale」を選択し、「<Select>」を選択します。
- 「ja_JP.UTF-8 UTF-8」を選択し(*を付ける)、「<Ok>」を選択します。
- システム環境のデフォルトロケールに、「ja_JP.UTF-8」を選択し、「<Ok>」を選択します。
続いて、タイムゾーンを設定します。
- raspi-configのトップ画面で、「5 Localisation Options」を選択し、「<Select>」を選択します。
- 「L2 Timezone」を選択し、「<Select>」を選択します。
- 「Asia」を選択し、「<Ok>」をクリックします。
- 「Tokyo」を選択し、「<Ok>」を選択します。
- raspi-configのトップ画面が表示されますので、「<Finish>」を選択し、終了します。
最後に、「<Finish>」を選択します。
Apache Webサーバのインストール
Webサーバとして使用するApache Webサーバのインストールを行います。Apache(アパッチ)は、世界中で使用されているWebサーバ・ソフトウェアです。
pi@raspberrypi:~ $ sudo apt install apache2
pi@raspberrypi:~ $
インストールされたバージョンを確認します。
pi@raspberrypi:~ $ apache2 -v
Server version: Apache/2.4.38 (Raspbian)
Server built:   2020-08-25T20:08:29
pi@raspberrypi:~ $
PHPのインストール
PHPスクリプト言語のインストールを行います。Raspberry Pi OSの標準のaptリポジトリでは、PHP7.3のインストールしかできないため、ここでは、SURY PPA(Personal Package Archive)リポジトリを使用して、PHP7.4をインストールします。
必要なパッケージのインストール
はじめに、SURY PPAリポジトリを使用する上で必要なパッケージのインストールを行います。
pi@raspberrypi:~ $ sudo apt install lsb-release apt-transport-https ca-certificates
pi@raspberrypi:~ $
GPGキーのダウンロードと保存
SURY PPAリポジトリを使用する際に必要になるGPGキーのダウンロードと保存を行います。
pi@raspberrypi:~ $ sudo wget -O /etc/apt/trusted.gpg.d/php.gpg https://packages.sury.org/php/apt.gpg
pi@raspberrypi:~ $
SURY PPAリポジトリの追加
SURY PPAリポジトリをaptリポジトリに追加します。
pi@raspberrypi:~ $ echo "deb https://packages.sury.org/php/ $(lsb_release -sc) main" | sudo tee /etc/apt/sources.list.d/php.list
pi@raspberrypi:~ $
パッケージ一覧の更新
PPAリポジトリを使用して、パッケージ一覧を更新します。
pi@raspberrypi:~ $ sudo apt update
pi@raspberrypi:~ $
パッケージの更新
更新可能なパッケージがある場合は、パッケージ更新を行います。
pi@raspberrypi:~ $ sudo apt upgrade
pi@raspberrypi:~ $
PHP7.4のインストール
PHP7.4のインストールを行います。
pi@raspberrypi:~ $ sudo apt install php7.4
pi@raspberrypi:~ $
バージョン確認
インストールを行ったPHPのバージョンを確認します。
pi@raspberrypi:~ $ php -v
PHP 7.4.15 (cli) (built: Feb 12 2021 14:48:10) ( NTS )
Copyright (c) The PHP Group
Zend Engine v3.4.0, Copyright (c) Zend Technologies
    with Zend OPcache v7.4.15, Copyright (c), by Zend Technologies
pi@raspberrypi:~ $
PHPモジュールのインストール
WordPressサーバを動作させる上で必要なPHPモジュールのインストールを行います。
pi@raspberrypi:~ $ sudo apt install php7.4-curl php7.4-json php7.4-mbstring php7.4-mysql php7.4-imagick php7.4-xml php7.4-zip
pi@raspberrypi:~ $WordPressのサーバ要件は、公式ページの「Server Environment」に記載されていますので、ご参照下さい。
PHPの設定
「/etc/php/7.4/apache2/php.ini」ファイルを以下のとおり、編集します。
pi@raspberrypi:~ $ sudo vi /etc/php/7.4/apache2/php.ini

【編集内容】
~(略)~
[mbstring]
; language for internal character representation.
; This affects mb_send_mail() and mbstring.detect_order.
; http://php.net/mbstring.language
mbstring.language = Japanese   <== コメントアウト解除
~(略)~
memory_limit = 128M
post_max_size = 40M
upload_max_filesize = 30M

pi@raspberrypi:~ $
「memory_limit」、「post_max_size」、「upload_max_filesize」の初期の設定値では、サイズの大きなテーマをアップロードした場合にエラーになる場合があります。このため、設定変更を行います。
各設定値は、「memory_limit」の数値が一番大きく、続いて、「post_max_size」の数値、そして、「upload_max_filesize」が一番小さい数値になるよう調整する必要があります。
php-fpmのインストール
Apache WebサーバからPHPを使用する際に必要になるphp-fpmのインストールを行います。
php-fpmは、FPM(FastCGI Process Manager)と言われるPHPのFastCGI実装のひとつです。
pi@raspberrypi:~ $ sudo apt install php7.4-fpm
パッケージリストを読み込んでいます... 完了
    ~(中略)~
Creating config file /etc/php/7.4/fpm/php.ini with new version
NOTICE: Not enabling PHP 7.4 FPM by default.
NOTICE: To enable PHP 7.4 FPM in Apache2 do:
NOTICE: a2enmod proxy_fcgi setenvif
NOTICE: a2enconf php7.4-fpm
NOTICE: You are seeing this message because you have apache2 package installed.
Created symlink /etc/systemd/system/multi-user.target.wants/php7.4-fpm.service → /lib/systemd/system/php7.4-fpm.service.
man-db (2.8.5-2) のトリガを処理しています ...
systemd (241-7~deb10u6+rpi1) のトリガを処理しています ...
php7.4-fpm (7.4.15-2+0~20210212.37+debian10~1.gbp5dee47) のトリガを処理しています ...
NOTICE: Not enabling PHP 7.4 FPM by default.
NOTICE: To enable PHP 7.4 FPM in Apache2 do:
NOTICE: a2enmod proxy_fcgi setenvif
NOTICE: a2enconf php7.4-fpm
NOTICE: You are seeing this message because you have apache2 package installed.
pi@raspberrypi:~ $
上記の実行結果より、php-fpmのインストールを行うと、自動的に有効化され、必要な設定が行われます。
上記のphp-fpmのインストール実行結果より、インストールを行うと、自動的に有効化され、必要な設定が行われます。
Apache Webサーバの再起動を行います。
pi@raspberrypi:~ $ sudo systemctl restart apache2
pi@raspberrypi:~
PHP環境の動作確認
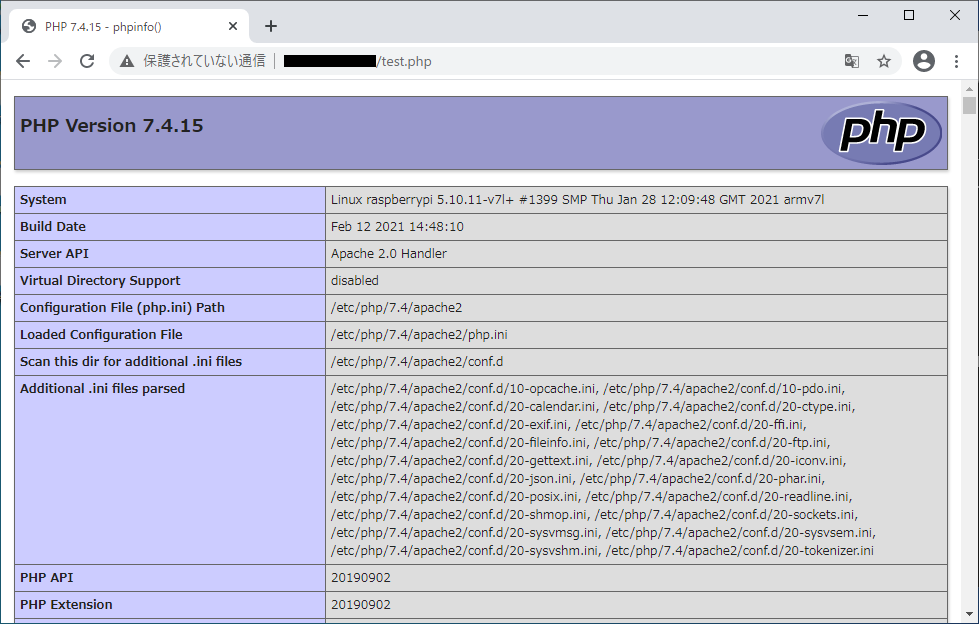
以下のテスト用ファイル「test.php」をドキュメントルート(/var/www/)に作成し、PHPの動作確認を行います。
pi@raspberrypi:~ $ sudo vi /var/www/html/test.php

【記載内容】
<?php
        phpinfo();
?>

pi@raspberrypi:~ $
Webブラウザを使用して、以下のURLにアクセスに、PHPの各種情報が表示されることを確認します。
URL:http://<IPアドレス または、ドメイン名>/test.php
Apache Webサーバの設定
ServerNameディレクティブの設定
Apache Webサーバをインストールした直後の初期設定では、「ServerName」ディレクティブが設定されていませんので、「/etc/apache2/apache2.conf」ファイルを編集し、「ServerName」ディレクティブにサーバ名を記載します。
「ServerName」ディレクティブは、以下のように、「# Global configuration」というコメントの下に追記します。記載するサーバ名は、ご使用の環境に応じて、適宜置き換えてください。
(ここでは、サーバ名を「www.ingenious.jp」とします。)
pi@raspberrypi:~ $ sudo vi /etc/apache2/apache2.conf

【記載内容】
# Global configuration
#

ServerName www.ingenious.jp  <-- 「# Global configuration」のコメントの下に追記

pi@raspberrypi:~ $
ServerNameディレクティブを記載しなかった場合、「apache2ctl」などのコマンドを実行した時に、以下のメッセージが出力されます。
AH00558: apache2: Could not reliably determine the server’s fully qualified domain name, using 127.0.1.1. Set the ‘ServerName’ directive globally to suppress this message
DirectoryIndexディレクティブの設定変更
初期設定では、Webブラウザからのリクエストが、ディレクトリだった場合やファイルが指定されなかった場合(最後が「/」で終る)に「index.html」ファイルが返される設定になっています。このため、WordPressのトップページである「index.php」ファイルが返されるように、設定変更を行います。
以下のとおり、「/etc/apache2/mods-available/dir.conf」ファイルを編集し、WordPressのトップページである「index.php」ファイルが最初に返されるように設定変更を行います。
pi@raspberrypi:~ $ sudo vi /etc/apache2/mods-available/dir.conf

【編集前】
<IfModule mod_dir.c>
        DirectoryIndex index.html index.cgi index.pl index.php index.xhtml index.htm
</IfModule>

【編集後】:「index.php」を一番最初に記載します。
<IfModule mod_dir.c>
        DirectoryIndex index.php index.html index.cgi index.pl index.xhtml index.htm
</IfModule>

pi@raspberrypi:~ $
DirectoryIndexディレクティブに記載した順に、ファイルが返されます。
Rewriteモジュールの有効化
WordPress は、「.htaccess」ファイルに記載されているRewriteモジュールを使用したRewriteRuleに基づき、パーマリンクを実現しています。
「.htaccess」ファイルは、Apache Webサーバを使用した環境で、ディレクトリ単位で制御を行う設定ファイルです。「.htaccess」ファイルを特定のディレクトリに配置すると、「.htaccess」ファイル内に記述されている設定内容が、配置されたディレクトリ内とその配下のディレクトリ内に対して適用されます。
しかし、Apache Webサーバをインストールした直後の初期設定では、Rewriteモジュールが有効化されていません。Rewriteモジュールの状態は、以下のコマンドにより確認することができます。
pi@raspberrypi:~ $ apache2ctl -t -D DUMP_MODULES | grep rewrite
pi@raspberrypi:~ $

※有効化されている場合、「rewrite_module (shared)」と表示されます。
注意!
Rewriteモジュールが無効化されている状態で、投稿記事を作成し「下書き保存」や「公開」しようとすると以下の画面のように、「更新に失敗しました。返答が正しいJSONレスポンスではありません。」と表示され、投稿記事を保存することができません。

このため、以下のコマンドを実行し、Rewriteモジュールを有効化する必要があります。
pi@raspberrypi:~ $ sudo a2enmod rewrite
Enabling module rewrite.
To activate the new configuration, you need to run:
  systemctl restart apache2
pi@raspberrypi:~ $
次に、変更内容を反映するため、以下のコマンドを実行し、Apache Webサーバを再起動します。
pi@raspberrypi:~ $ sudo systemctl restart apache2
pi@raspberrypi:~ $
再起動後、以下のコマンドを実行し、Rewriteモジュールが有効化されたことを確認します。
pi@raspberrypi:~ $ apache2ctl -t -D DUMP_MODULES | grep rewrite
 rewrite_module (shared)
pi@raspberrypi:~ $

※有効化されている場合、「rewrite_module (shared)」と表示されます。
AllowOverrideの設定変更
初期状態では、「.htaccess」ファイルに記載できるディレクティブは、すべて無効化されています。
「.htaccess」ファイルに記述したディレクティブが有効化されるように、以下のように「/etc/apache2/apache2.conf」ファイルを編集します。また、念のため、ディレクトリが指定された場合に、ファイルが一覧表示されないように変更を行います。
pi@raspberrypi:~ $ sudo vi /etc/apache2/apache2.conf

【変更前】
<Directory /var/www/>
        Options Indexes FollowSymLinks
        AllowOverride None
        Require all granted
</Directory>

【変更後】
<Directory /var/www/>
        Options FollowSymLinks  <-- 「Indexes」を削除
        AllowOverride All  <-- 「All」に修正
        Require all granted
</Directory>

pi@raspberrypi:~ $
Optionsは、任意のディレクトリに対して使用できる機能を設定するためのディレクティブです。
| Indexes | ディレクトリに対するリクエストに対して、DirectoryIndexで指定したファイル (index.php等)が存在しない場合に、ディレクトリ内ファイルの一覧を表示します。 |
| FollowSymLinks | シンボリックリンクのリンク先を参照できるようにします。 |
AllowOverrideは、「.htaccess」ファイルで使用できるディレクティブを指定するためのディレクティブです。
| None | 「.htaccess」ファイルでは、すべてのディレクティブが使用できません。 |
| All | 「.htaccess」ファイルで記述可能なディレクティブをすべて使用できます。 |
MariaDBのインストール
データベース管理システムとして使用するMariaDBデータベースのインストールを行います。
MariaDBは、MySQLから派生したオープンソースソフトウェアのリレーショナルデータベース管理システム(RDBMS)で、無料で使用することができます。また、MySQLと高い互換性を有しています。
MariaDBのインストール
本記事では、標準のaptリポジトリからインストールできる「Version 10.3」をインストールします。
pi@raspberrypi:~ $ sudo apt install mariadb-server-10.3
pi@raspberrypi:~ $
インストールを行ったバージョンを確認します。
pi@raspberrypi:~ $ sudo mysql -u root -p
Enter password:  <-- [Enter]を押します。
Welcome to the MariaDB monitor.  Commands end with ; or \g.
Your MariaDB connection id is 12
Server version: 10.3.27-MariaDB-0+deb10u1 Raspbian 10

Copyright (c) 2000, 2018, Oracle, MariaDB Corporation Ab and others.

Type 'help;' or '\h' for help. Type '\c' to clear the current input statement.

MariaDB [(none)]> quit
Bye
pi@raspberrypi:~ $
MariaDBの初期設定
MariaDBの初期設定を行います。「mysql_secure_installation」スクリプトを使用して、MariaDBのセキュリティオプション等の設定を行います。
pi@raspberrypi:~ $ sudo  mysql_secure_installation

NOTE: RUNNING ALL PARTS OF THIS SCRIPT IS RECOMMENDED FOR ALL MariaDB
      SERVERS IN PRODUCTION USE!  PLEASE READ EACH STEP CAREFULLY!

In order to log into MariaDB to secure it, we'll need the current
password for the root user.  If you've just installed MariaDB, and
you haven't set the root password yet, the password will be blank,
so you should just press enter here.

Enter current password for root (enter for none):    <== [Enter]を押します。
OK, successfully used password, moving on...

Setting the root password ensures that nobody can log into the MariaDB
root user without the proper authorisation.

Set root password? [Y/n] Y   <== rootパスワード設定するため、[Y]を入力します。
New password:    <== パスワードを入力します。
Re-enter new password:   <== 再度パスワードを入力します。
Password updated successfully!
Reloading privilege tables..
 ... Success!


By default, a MariaDB installation has an anonymous user, allowing anyone
to log into MariaDB without having to have a user account created for
them.  This is intended only for testing, and to make the installation
go a bit smoother.  You should remove them before moving into a
production environment.

Remove anonymous users? [Y/n] Y    <== 匿名ユーザーを削除するため、[Y]を入力します。
 ... Success!

Normally, root should only be allowed to connect from 'localhost'.  This
ensures that someone cannot guess at the root password from the network.

Disallow root login remotely? [Y/n] Y    <== リモート接続を拒否するため、[Y]を入力します。
 ... Success!

By default, MariaDB comes with a database named 'test' that anyone can
access.  This is also intended only for testing, and should be removed
before moving into a production environment.

Remove test database and access to it? [Y/n] Y    <== 不要なテストデータベースを削除するため
 - Dropping test database...                          [Y]を入力します。
 ... Success!
 - Removing privileges on test database...
 ... Success!

Reloading the privilege tables will ensure that all changes made so far
will take effect immediately.

Reload privilege tables now? [Y/n] Y    <== これまでに設定した内容を反映するため
 ... Success!                               [Y]を入力します。

Cleaning up...

All done!  If you've completed all of the above steps, your MariaDB
installation should now be secure.

Thanks for using MariaDB!
pi@raspberrypi:~ $
初期設定の変更
インストール直後の初期状態では、「mysql -u root -p」コマンドで接続することができませんが、「sudo mysql -u root -p」コマンドでは、接続できる状態になっています。
pi@raspberrypi:~ $ mysql -u root -p
Enter password:
ERROR 1698 (28000): Access denied for user 'root'@'localhost'
pi@raspberrypi:~ $ sudo mysql -u root -p
Enter password:
Welcome to the MariaDB monitor.  Commands end with ; or \g.
Your MariaDB connection id is 59
Server version: 10.3.27-MariaDB-0+deb10u1 Raspbian 10

Copyright (c) 2000, 2018, Oracle, MariaDB Corporation Ab and others.

Type 'help;' or '\h' for help. Type '\c' to clear the current input statement.

MariaDB [(none)]> quit
Bye
pi@raspberrypi:~ $
このため、以下のSQLコマンドを実行し、「mysql -u root -p」コマンドで接続できるように変更します。
pi@raspberrypi:~ $ sudo mysql -u root -p
Enter password:
Welcome to the MariaDB monitor.  Commands end with ; or \g.
Your MariaDB connection id is 64
Server version: 10.3.27-MariaDB-0+deb10u1 Raspbian 10

Copyright (c) 2000, 2018, Oracle, MariaDB Corporation Ab and others.

Type 'help;' or '\h' for help. Type '\c' to clear the current input statement.

MariaDB [(none)]> grant all privileges on *.* to root@localhost identified by 'password' with grant option;
Query OK, 0 rows affected (0.001 sec)

MariaDB [(none)]> flush privileges;
Query OK, 0 rows affected (0.001 sec)

MariaDB [(none)]> quit
Bye
pi@raspberrypi:~ $
「mysql -u root -p」で接続できることを確認します。
pi@raspberrypi:~ $ mysql -u root -p
Enter password:
Welcome to the MariaDB monitor.  Commands end with ; or \g.
Your MariaDB connection id is 66
Server version: 10.3.27-MariaDB-0+deb10u1 Raspbian 10

Copyright (c) 2000, 2018, Oracle, MariaDB Corporation Ab and others.

Type 'help;' or '\h' for help. Type '\c' to clear the current input statement.

MariaDB [(none)]> quit
Bye
pi@raspberrypi:~ $
WordPressのインストール
WordPressのダウンロード
WordPressのダウンロードを行います。
pi@raspberrypi:~ $ wget https://ja.wordpress.org/latest-ja.tar.gz
pi@raspberrypi:~ $
「latest-ja.tar.gz」ファイルがダウンロードされます。
pi@raspberrypi:~ $ ls -l
合計 15940
drwxr-xr-x 2 pi   pi       4096  1月 11 22:01 Bookshelf
-rw-r--r-- 1 root root       46  2月 17 18:57 buster
-rw-r--r-- 1 root root       46  2月 17 18:57 deb
-rw-r--r-- 1 pi   pi   16304330  2月 12 17:00 latest-ja.tar.gz
-rw-r--r-- 1 root root       46  2月 17 18:57 main
pi@raspberrypi:~ $
次に、解凍を行います。
pi@raspberrypi:~ $ tar -xzvf latest-ja.tar.gz
pi@raspberrypi:~ $
「wordpress」というディレクトリが作成されます。
pi@raspberrypi:~ $ ls -l
合計 15944
drwxr-xr-x 2 pi   pi       4096  1月 11 22:01 Bookshelf
-rw-r--r-- 1 root root       46  2月 17 18:57 buster
-rw-r--r-- 1 root root       46  2月 17 18:57 deb
-rw-r--r-- 1 pi   pi   16304330  2月 12 17:00 latest-ja.tar.gz
-rw-r--r-- 1 root root       46  2月 17 18:57 main
drwxr-xr-x 5 pi   pi       4096  2月 12 17:00 wordpress
pi@raspberrypi:~ $
データベースとユーザーの作成
本記事では、MySQLコマンドを使用して、データベースを作成します。
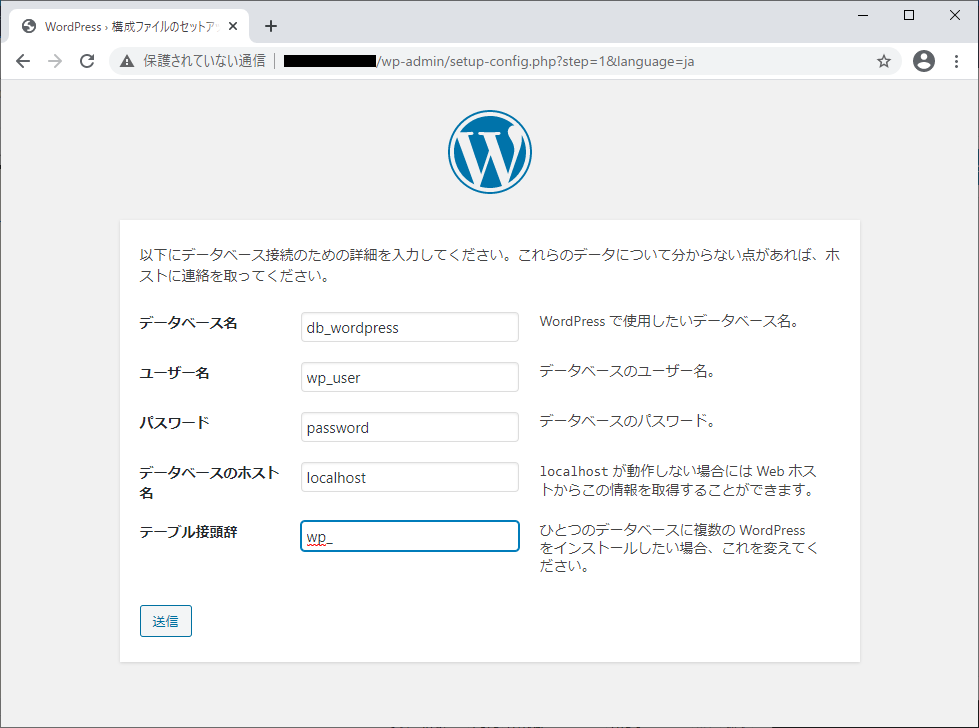
ここでは、データベース名を「db_wordpress」、ユーザー名を「wp_user」、パスワードを「password」とします。
pi@raspberrypi:~ $ mysql -u root -p
Enter password:
Welcome to the MariaDB monitor.  Commands end with ; or \g.
Your MariaDB connection id is 13
Server version: 10.3.27-MariaDB-0+deb10u1 Raspbian 10

Copyright (c) 2000, 2018, Oracle, MariaDB Corporation Ab and others.

Type 'help;' or '\h' for help. Type '\c' to clear the current input statement.

MariaDB [(none)]> CREATE DATABASE db_wordpress;
Query OK, 1 row affected (0.001 sec)

MariaDB [(none)]> GRANT ALL PRIVILEGES ON db_wordpress.* TO "wp_user"@"localhost" IDENTIFIED BY "password";
Query OK, 0 rows affected (0.003 sec)

MariaDB [(none)]> FLUSH PRIVILEGES;
Query OK, 0 rows affected (0.001 sec)

MariaDB [(none)]> quit
Bye
pi@raspberrypi:~ $
wp-config.phpファイルの作成
WordPressの設定は、「wp-config.php」設定ファイルを事前に作成する方法とインストールスクリプトを使用する方法がありますが、本記事では、インストール・スクリプトを使用して設定を行います。
WordPressのファイルのアップロード
本記事では、Apache Webサーバのドキュメント・ルート・ディレクトリにWordPressのファイルをアップロードします。
pi@raspberrypi:~ $ sudo cp -R ./wordpress/* /var/www/html/
pi@raspberrypi:~ $権限の設定
Apache Webサーバのドキュメント・ルート・ディレクトリにアップロードしたWordPressファイルの権限設定を行います。Apache Webサーバの実行ユーザー(www-data)の権限を設定します。
pi@raspberrypi:~ $ sudo chown -R www-data:www-data /var/www/html/
pi@raspberrypi:~ $
WordPressサーバのセットアップ
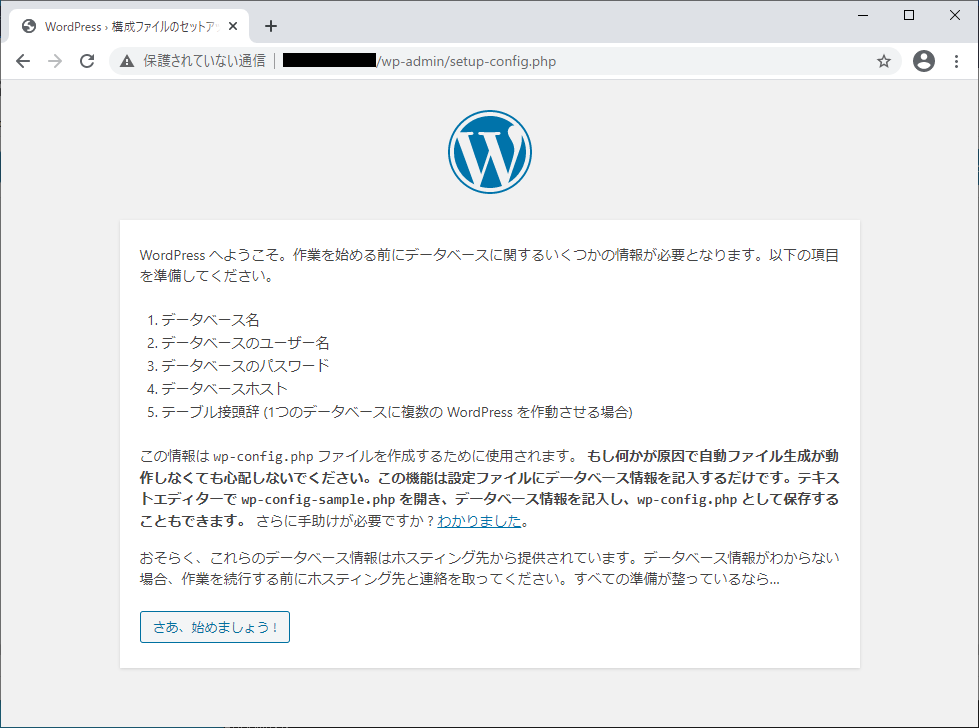
インストール・スクリプトを使用して、初期セットアップを行います。
Webブラウザを使用して、以下のURLにアクセスします。
URL:http://<IPアドレス または、ドメイン名>/wp-admin/install.php
以下の画面が表示されますので、「さあ、始めましょう!」をクリックします。
以下の画面が表示されますので、「データベース名」、「ユーザー名」、「パスワード」、「データベースのホスト」の各入力欄に、先ほど作成したデータベース及びユーザーに関する情報を入力します。「テーブル接頭辞」は、特に理由がない限り、変更の必要はありません。
入力が完了したら、「送信」をクリックします。
以下の画面が表示されますので、「インストール実行」をクリックします。

以下の「ようこそ」という画面が表示されますので、サイトの設定情報を入力します。
入力するサイトの設定情報は、適宜、環境に応じて入力してください。
入力が完了したら、「WordPressをインストール」をクリックします。

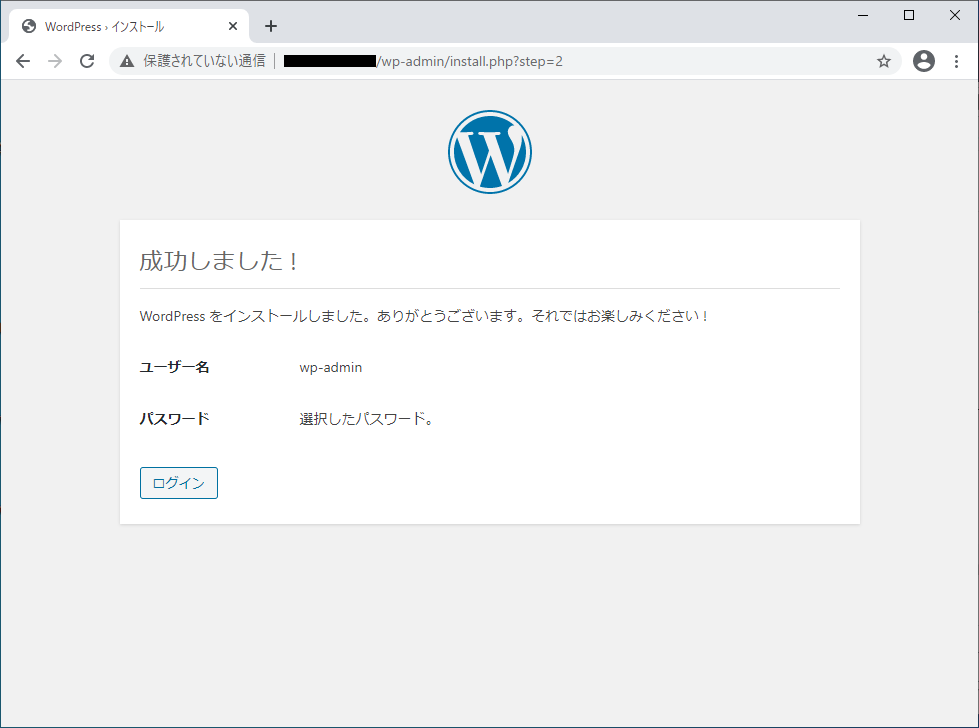
以下の画面が表示されれば、WordPressサーバのインストールは完了です。
「ログイン」をクリックします。
「ユーザー名」及び「パスワード」を入力し、「ログイン」をクリックします。
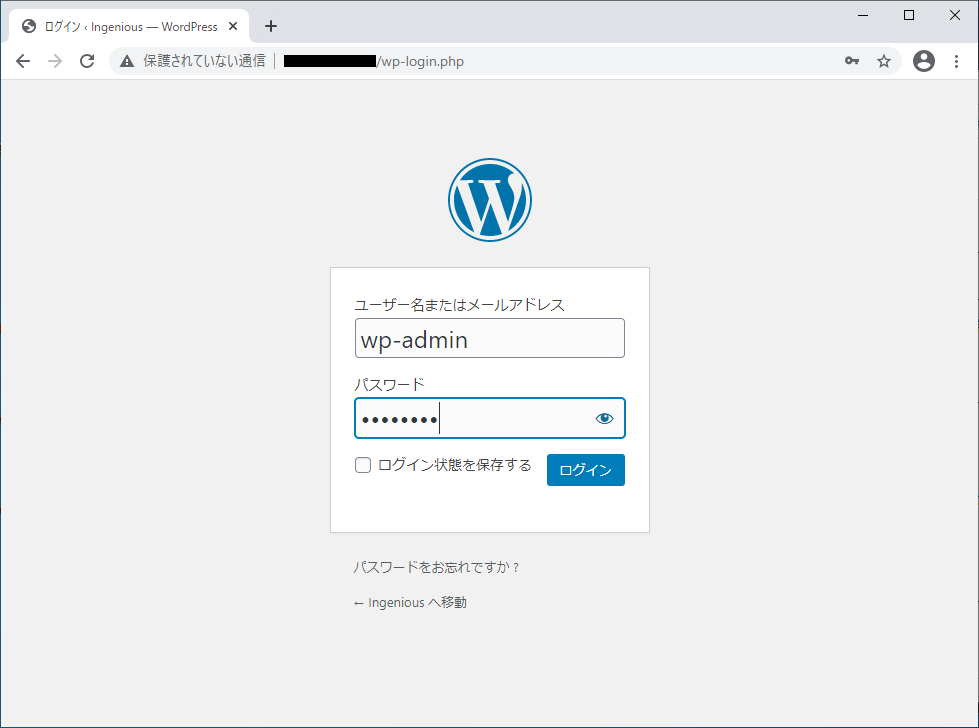
以上でWordPressサーバの構築は終了です。
コメント
[…] それではラズパイにインストールしていきます参考元はこちらとなります。 […]