
はじめに
本文章では、AlmaLinux9、Apache2サーバ、MySQLサーバを使用して、Redmineサーバを構築する方法について記載します。本文章で使用するRedmineのバージョンは、文章管理で使用する「Redmine DMSF Plugin」の依存関係を考慮し、「Redmine 5.0」を使用します。
【参考】
Redmine DMSF プラグインは、Redmineにドキュメント管理システム機能を追加するプラグインモジュールです。標準のRedmineの文章機能に比べ、ドキュメントのディレクトリ構造での管理、ドキュメントのバージョン管理、改訂履歴などを行うことができます。
詳細は、公式ホームページを確認してください。
環境
・OS
AlmaLinux release 9.0 (Emerald Puma)
・Webサーバ
Apache/2.4.51 (Railsの実行には、Passengerを使用)
・データベースサーバ
Ver 8.0.31 for Linux on x86_64 (MySQL Community Server – GPL)
・Ruby
ruby 3.1.2p20 (2022-04-12 revision 4491bb740a) [x86_64-linux]
・Rails
Rails 6.1.7
・Redmine
Redmine 5.0.3
Redmineの前提条件
Redmineのバージョンごとに必要なRubyバージョンおよびRailsバージョンは、以下の通りです。
詳細は、Redmineの公式ホームページを記載されていますので、ご確認ください。
| Redmineバージョン | サポートされるRubyのバージョン | 使用するRailsのバージョン |
|---|---|---|
| 5.0 | Ruby 2.51, 2.6, 2.7, 3.0, 3.1 | Rails 6.1 |
| 4.2 | Ruby 2.41, 2.51, 2.6, 2.72 | Rails 5.2 |
| 4.1 | Ruby 2.31, 2.41, 2.51, 2.6 | Rails 5.2 |
1.Ruby 2.5以前のサポートは、Rubyコミュニティによって終了されました。
2.Redmine 4.2は、Ruby 2.7.0および2.7.1をサポートしていません。 Ruby 2.7.2 以降を使用してください。
事前準備
AlmaLinuxの設定
使用したAlmaLinuxのバージョン
本文章では、以下のAlmaLinuxを使用しました。
[root@localhost ~]# cat /etc/redhat-release
AlmaLinux release 9.0 (Emerald Puma)
[root@localhost ~]#
[root@localhost ~]# uname -a
Linux localhost.localdomain 5.14.0-70.30.1.el9_0.x86_64 #1 SMP PREEMPT Wed Nov 2 19:00:30 EDT 2022 x86_64 x86_64 x86_64 GNU/Linux
[root@localhost ~]#
SELinuxの無効化
「/etc/selinux/config」ファイルを編集し、SELinuxを無効化します。
[root@localhost ~]$ vi /etc/selinux/config
【変更内容】
#SELINUX=enforcing  <-- コメントアウト
SELINUX=disabled  <-- disableと記載
[root@localhost ~]$
変更を反映するため、AlmaLinuxを再起動します。
[root@localhost ~]# rebootfirewalldの設定変更
デフォルト設定では、ssh接続のみ許可されており、httpで接続することができません。このため、httpで接続できるように、ファイアウォールの規則を変更します。
[root@localhost ~]# firewall-cmd --add-service=http --zone=public --permanent
success
[root@localhost ~]#
変更内容を反映します。
[root@localhost ~]# firewall-cmd --reload
success
[root@localhost ~]#
ファイアウォール規則が変更され、httpが許可されていることを確認します。
[root@localhost ~]# firewall-cmd --list-all
public (active)
  target: default
  icmp-block-inversion: no
  interfaces: ens33
  sources:
  services: cockpit dhcpv6-client http ssh  <-- httpが追加されていることを確認
  ports:
  protocols:
  forward: yes
  masquerade: no
  forward-ports:
  source-ports:
  icmp-blocks:
  rich rules:
[root@localhost ~]#
Redmine用ユーザーの作成
redmine用のユーザーを作成します。ここでは、ユーザー名を「redmine」、ホームディレクトリを「/opt/redmine」とします。このホームディレクトリ(/opt/redmine)に、Redmineのプロジェクトを作成します。
[root@localhost ~]# useradd -d /opt/redmine redmine
[root@localhost ~]#
[root@localhost ~]# ls -l /opt
合計 0
drwx------. 2 redmine redmine 76 11月  4 11:08 redmine
[root@localhost ~]#
パスワードを設定します。
[root@localhost ~]# passwd redmine
[root@localhost ~]#
redmine用ユーザーのsudoの有効化
作成したredmineユーザーで、sudoを使用できるようにします。
コマンド「 visudo」を実行して、「/etc/sudoers」を編集します。
[root@localhost ~]# visudo

【編集内容】
## Allows people in group wheel to run all commands
%wheel  ALL=(ALL)       ALL

## Same thing without a password
%wheel        ALL=(ALL)       NOPASSWD: ALL   <-- コメントアウトを解除

[root@localhost ~]#
redmineユーザーを「wheel」グループに追加します。
[root@localhost ~]# usermod -aG wheel redmine
[root@localhost ~]#
sshなどで接続している場合は、設定を反映するため再接続します。
必要なパッケージのインストール
Redmineサーバ環境を構築する際に必要になる開発ツールおよびパッケージをインストールします。
[root@localhost ~]# dnf group install "Development Tools"
[root@localhost ~]# dnf install git curl zlib wget openssl libcurl-devel zlib-devel openssl-devel
[root@localhost ~]#
「MySQL Community」サーバのインストール
本文章では、「MySQL Community」サーバをインストールします。
【備考】
MySQL Community Editionは、オープンソースのデータベースで、無償で自由にダウンロードして利用することができるバージョンです。
「MySQL Yum Repository」の追加
「MySQL Yum Repository」を追加します。
[root@localhost ~]# dnf install https://dev.mysql.com/get/mysql80-community-release-el9-1.noarch.rpm
[root@localhost ~]#
「MySQL Yum Repository」が追加されていることを確認します。
[root@localhost ~]# dnf repolist
repo id                                            repo の名前
appstream                                          AlmaLinux 9 - AppStream
baseos                                             AlmaLinux 9 - BaseOS
extras                                             AlmaLinux 9 - Extras
mysql-connectors-community                         MySQL Connectors Community
mysql-tools-community                              MySQL Tools Community
mysql80-community                                  MySQL 8.0 Community Server
[root@localhost ~]#
「MySQL Community」サーバのインストール
「MySQL Community 8.0」をインストールします。
[root@localhost ~]# dnf install mysql-community-server mysql-community-devel mysql-community-client
インストール済み:
  mysql-community-client-8.0.31-1.el9.x86_64
  mysql-community-client-plugins-8.0.31-1.el9.x86_64
  mysql-community-common-8.0.31-1.el9.x86_64
  mysql-community-devel-8.0.31-1.el9.x86_64
  mysql-community-icu-data-files-8.0.31-1.el9.x86_64
  mysql-community-libs-8.0.31-1.el9.x86_64
  mysql-community-server-8.0.31-1.el9.x86_64

完了しました!
[root@localhost ~]#
「MySQL Community」サーバの初期設定
「MySQL Community」サーバを起動します。
[root@localhost ~]# systemctl start mysqld.service
[root@localhost ~]#
「MySQL Community」サーバの「仮のrootパスワード」を確認します。
仮のrootパスワードは、「MySQL Community」サーバのログファイル(/var/log/mysqld.log)に記載されています。
[root@localhost ~]# cat /var/log/mysqld.log | grep password
2022-11-04T04:26:26.172450Z 6 [Note] [MY-010454] [Server] A temporary password is generated for root@localhost: 8MAQI3x?wsdR
[root@localhost ~]#
「mysql_secure_installation」スクリプトを使用して初期設定を行います。
[root@localhost ~]# mysql_secure_installation

Securing the MySQL server deployment.

Enter password for user root:  <-- 確認した仮のrootパスワードを入力

The existing password for the user account root has expired. Please set a new password.

New password:  <-- 設定するrootのパスワードを入力

Re-enter new password:  <-- 設定するrootのパスワードを再入力
The 'validate_password' component is installed on the server.
The subsequent steps will run with the existing configuration
of the component.
Using existing password for root.

Estimated strength of the password: 100
Change the password for root ? ((Press y|Y for Yes, any other key for No) :  <-- [Enter]を押下

 ... skipping.
By default, a MySQL installation has an anonymous user,
allowing anyone to log into MySQL without having to have
a user account created for them. This is intended only for
testing, and to make the installation go a bit smoother.
You should remove them before moving into a production
environment.

Remove anonymous users? (Press y|Y for Yes, any other key for No) : y  <-- [y]を入力
Success.

Normally, root should only be allowed to connect from
'localhost'. This ensures that someone cannot guess at
the root password from the network.

Disallow root login remotely? (Press y|Y for Yes, any other key for No) : y  <-- [y]を入力
Success.

By default, MySQL comes with a database named 'test' that
anyone can access. This is also intended only for testing,
and should be removed before moving into a production
environment.

Remove test database and access to it? (Press y|Y for Yes, any other key for No) : y  <-- [y]を入力
 - Dropping test database...
Success.

 - Removing privileges on test database...
Success.

Reloading the privilege tables will ensure that all changes
made so far will take effect immediately.

Reload privilege tables now? (Press y|Y for Yes, any other key for No) : y  <-- [y]を入力
Success.

All done!
[root@localhost ~]#
「MySQL Community」サーバの接続確認
「MySQL Community」サーバへ接続できることを確認します。
[root@localhost ~]# mysql -uroot -p
Enter password:  <-- 設定したパスワードを入力
Welcome to the MySQL monitor.  Commands end with ; or \g.
Your MySQL connection id is 11
Server version: 8.0.31 MySQL Community Server - GPL

Copyright (c) 2000, 2022, Oracle and/or its affiliates.

Oracle is a registered trademark of Oracle Corporation and/or its
affiliates. Other names may be trademarks of their respective
owners.

Type 'help;' or '\h' for help. Type '\c' to clear the current input statement.

mysql> quit
Bye
[root@localhost ~]#
Ruby実行環境の構築
本文章では、「rbenv」および「ruby-build」プラグインを使用して、Ruby実行環境を構築します。
【参考】
rbenvは、Rubyプログラミング言語用のバージョン管理を行うマネージャーツールです。
同じマシン上で複数のRubyバージョンを切り替えて使用したり、プロジェクトで使用するRubyのバージョンをそれぞれ指定することができます。
「rbenv install」コマンドは、「rbenv」に含まれておらず、「ruby-build」プラグインによって提供されているため、別途、「ruby-build」プラグインをインストールする必要があります。
「rbenv」のインストール
redmineユーザーに切り替え、このホームディレクトリ(/opt/redmine)に、Rubyの実行環境を構成します。
[root@localhost ~]# su - redmine
[redmine@localhost ~]$
本文章では、Gitを使用して「rbenv」をインストールします。
[redmine@localhost ~]$ git clone https://github.com/rbenv/rbenv.git ~/.rbenv
Cloning into '/opt/redmine/.rbenv'...
remote: Enumerating objects: 3138, done.
remote: Counting objects: 100% (288/288), done.
remote: Compressing objects: 100% (156/156), done.
remote: Total 3138 (delta 166), reused 223 (delta 122), pack-reused 2850
Receiving objects: 100% (3138/3138), 627.53 KiB | 7.38 MiB/s, done.
Resolving deltas: 100% (1956/1956), done.
[redmine@localhost ~]$
redmineユーザーでログインした際に、「rbenv」をロードするようにシェルを構成します。
[redmine@localhost ~]$ echo 'eval "$(~/.rbenv/bin/rbenv init - bash)"' >> ~/.bash_profile
[redmine@localhost ~]$
設定を反映するため再接続します。
「rbenv」のバージョンを確認します。
[redmine@localhost ~]$ rbenv -v
rbenv 1.2.0-46-g52acbdf
[redmine@localhost ~]$
「ruby-build」プラグインのインストール
「rbenv install」コマンドは、「rbenv」に含まれておらず「ruby-build」プラグインによって提供されています。このため、Gitを使用して「ruby-build」プラグインをインストールします。
[redmine@localhost ~]$ git clone https://github.com/rbenv/ruby-build.git "$(rbenv root)"/plugins/ruby-build
Cloning into '/opt/redmine/.rbenv/plugins/ruby-build'...
remote: Enumerating objects: 13268, done.
remote: Counting objects: 100% (1967/1967), done.
remote: Compressing objects: 100% (299/299), done.
remote: Total 13268 (delta 1790), reused 1743 (delta 1657), pack-reused 11301
Receiving objects: 100% (13268/13268), 2.67 MiB | 8.65 MiB/s, done.
Resolving deltas: 100% (9028/9028), done.
[redmine@localhost ~]$
「Ruby」のインストール
インストール可能なRubyの安定版バージョンを確認します。
[redmine@localhost ~]$ rbenv install --list
2.7.6
3.0.4
3.1.2
jruby-9.3.9.0
mruby-3.1.0
picoruby-3.0.0
rbx-5.0
truffleruby-22.3.0
truffleruby+graalvm-22.3.0

Only latest stable releases for each Ruby implementation are shown.
Use 'rbenv install --list-all / -L' to show all local versions.
[redmine@localhost ~]$
本文章では、安定版バージョンの「3.1.2」をインストールします。
インストールではRubyのビルドが行われますので、実行状況を確認するため、「–verbose」オプションを付けます。
[redmine@localhost ~]$ rbenv install 3.1.2 --verbose
To follow progress, use 'tail -f /tmp/ruby-build.20221104114700.5263.log' or pass --verbose
Downloading ruby-3.1.2.tar.gz...
-> https://cache.ruby-lang.org/pub/ruby/3.1/ruby-3.1.2.tar.gz
Installing ruby-3.1.2...  <-- しばらく時間がかかります
Installed ruby-3.1.2 to /opt/redmine/.rbenv/versions/3.1.2
~(省略)~
NOTE: to activate this Ruby version as the new default, run: rbenv global 3.1.2
[redmine@localhost ~]$
全体で使用するRubyのバージョンおよびこのプロジェクト(ディレクトリ)で使用するRubyのバージョンを指定します。
[redmine@localhost ~]$ rbenv global 3.1.2  <-- 全体で使用するバージョン
[redmine@localhost ~]$ rbenv local 3.1.2  <-- プロジェクトで使用するバージョン
[redmine@localhost ~]$
各バージョンを確認します。
[redmine@localhost ~]$ rbenv global
3.1.2
[redmine@localhost ~]$ rbenv local
3.1.2
[redmine@localhost ~]$
「bundler」のインストール
Rubyのパッケージ管理ツールである「bundler」をRubyGemsパッケージ管理ツールを使用してインストールします。
[redmine@localhost ~]$ gem install bundler
Fetching bundler-2.3.25.gem
Successfully installed bundler-2.3.25
Parsing documentation for bundler-2.3.25
Installing ri documentation for bundler-2.3.25
Done installing documentation for bundler after 0 seconds
1 gem installed
[redmine@localhost ~]$
【注意】
gemをインストール場合に、sudoを使用しように注意してください。
【参考】
gemとは、Rubyのパッケージ(ライブラリ)のことです。また、少しややこしいですが、このgem(パッケージ)を管理するシステムである「RubyGems」のことをgemと呼ぶこともあります。しかし、最近では「RubyGems」パッケージ管理ツールを使用してgem(パッケージ)を管理する機会は少なく、「bundler」パッケージ管理ツールを使用するのが一般的になっています。
「bundler」を使用すると、依存関係のあるgem(パッケージ)をすべてインストールできるようになります。
「Rails」のインストール
本文章では、Redmine 5.0の要件である「Rails 6.1」をインストールします。
[redmine@localhost ~]$ gem install rails -v 6.1
[redmine@localhost ~]$
インストールしたRailsのバージョンを確認します。
[redmine@localhost ~]$ rails -v
Rails 6.1.0
[redmine@localhost ~]$
Redmineのインストール
Redmineのダウンロード
「Redmine 5.0」のパッケージを公式ホームページよりダウンロードします。
[redmine@localhost ~]$ wget https://www.redmine.org/releases/redmine-5.0.3.tar.gz
2022-11-04 12:54:22 (938 KB/s) - `redmine-5.0.3.tar.gz' へ保存完了 [3113409/3113409]
[redmine@localhost ~]$
Redmineパッケージの解凍
ダウンロードしたRedmineのパッケージをredmineのプロジェクトディレクトリに解凍します。
[redmine@localhost ~]$ tar zxvf redmine-5.0.3.tar.gz
[redmine@localhost ~]$
Redmine用データベースの作成
Redmineで使用するデータベース、接続時使用するユーザーを作成します。
本文章では、データベース名を「redmine」、ユーザー名を「redmine」、パスワードを「y5!RrkuS=zph」にします。
[redmine@localhost ~]$ mysql -uroot -p
Enter password:  <-- rootのパスワードを入力
Welcome to the MySQL monitor.  Commands end with ; or \g.
Your MySQL connection id is 12
Server version: 8.0.31 MySQL Community Server - GPL

Copyright (c) 2000, 2022, Oracle and/or its affiliates.

Oracle is a registered trademark of Oracle Corporation and/or its
affiliates. Other names may be trademarks of their respective
owners.

Type 'help;' or '\h' for help. Type '\c' to clear the current input statement.

mysql> CREATE DATABASE redmine CHARACTER SET utf8mb4;
Query OK, 1 row affected (0.01 sec)

mysql> CREATE USER 'redmine'@'localhost' IDENTIFIED BY 'y5!RrkuS=zph';
Query OK, 0 rows affected (0.01 sec)

mysql> GRANT ALL PRIVILEGES ON redmine.* TO 'redmine'@'localhost';
Query OK, 0 rows affected (0.01 sec)

mysql> quit
Bye
[redmine@localhost ~]$
データベースへの接続設定
Redmineで使用するデータベースへの接続設定を行います。
データベースへの接続設定は、「database.yml」ファイルを使用します。
[redmine@localhost ~]$ cd redmine-5.0.3/config/
[redmine@localhost config]$ cp database.yml.example database.yml
[redmine@localhost config]$ vi database.yml

【変更内容】
# Default setup is given for MySQL 5.7.7 or later.
# Examples for PostgreSQL, SQLite3 and SQL Server can be found at the end.
# Line indentation must be 2 spaces (no tabs).

production:
  adapter: mysql2
  database: redmine  <-- 作成したデータベース名を記載
  host: localhost
  username: redmine  <-- 作成した接続ユーザー名を記載
  password: "y5!RrkuS=zph"  <-- 作成した接続ユーザーのパスワードを記載
  # Use "utf8" instead of "utfmb4" for MySQL prior to 5.7.7
  encoding: utf8mb4

~以下、すべてをコメントアウト~

[redmine@localhost config]$
依存関係のインストール
Redmineのプロジェクトディレクトリへ移動し、「Bundler」を使用して、gemの依存関係パッケージをインストールします。
[redmine@localhost ~]$ cd ~/redmine-5.0.3
[redmine@localhost redmine-5.0.3]$ bundle install --without development test
Fetching gem metadata from https://rubygems.org/.........
Resolving dependencies.....
Using rake 13.0.6
~(省略)~
Please ensure that your Gemfiles and .gemspecs are suitably restrictive
to avoid an unexpected breakage when 3.0 is released (e.g. ~> 2.3.0).
See https://github.com/rubyzip/rubyzip for details. The Changelog also
lists other enhancements and bugfixes that have been implemented since
version 2.3.0.
[redmine@localhost redmine-5.0.3]$
セッション・ストア・シークレットの生成
Railsがセッション データを格納するCookieをエンコードするために使用するランダム キーを生成します。新しいシークレット トークンを生成すると、再起動後に既存のすべてのセッションが無効になります。
[redmine@localhost redmine-5.0.3]$ bundle exec rake generate_secret_token
[redmine@localhost redmine-5.0.3]$
データベース・スキーマ・オブジェクトの作成
Redmineのプロジェクトディレクトリのルートディレクトリで、次のコマンドを実行して、データベース構造を作成します。
[redmine@localhost redmine-5.0.3]$ RAILS_ENV=production bundle exec rake db:migrate
== 1 Setup: migrating =========================================================
-- create_table("attachments", {:options=>"ENGINE=InnoDB", :force=>true, :id=>:integer})
   -> 0.0248s
~(省略)~
== 20220224194639 DeleteOrphanedTimeEntryActivities: migrating ================
== 20220224194639 DeleteOrphanedTimeEntryActivities: migrated (0.0174s) =======

[redmine@localhost redmine-5.0.3]$
データベース・デフォルト・データセットの作成
デフォルトの構成データをデータベースに挿入します。
[redmine@localhost redmine-5.0.3]$ RAILS_ENV=production bundle exec rake redmine:load_default_data

Select language: ar, az, bg, bs, ca, cs, da, de, el, en, en-GB, es,
 es-PA, et, eu, fa, fi, fr, gl, he, hr, hu, id, it, ja, ko, lt, lv,
 mk, mn, nl, no, pl, pt, pt-BR, ro, ru, sk, sl, sq, sr, sr-YU, sv,
 th, tr, uk, vi, zh, zh-TW [en] ja  <-- [ja]と入力
====================================
Default configuration data loaded.
[redmine@localhost redmine-5.0.3]$
各構成ファイルのパーミッションの設定
各構成ファイルのパーミッションを設定します。
[redmine@localhost redmine-5.0.3]$ mkdir -p tmp tmp/pdf public/plugin_assets
[redmine@localhost redmine-5.0.3]$ chown -R redmine:redmine files log tmp public/plugin_assets
[redmine@localhost redmine-5.0.3]$ chmod -R 755 files log tmp public/plugin_assets
[redmine@localhost redmine-5.0.3]$
Redmineのインストール確認
本文章では、WEBrick Webサーバーを使用して、Redmineのインストール確認を行います。
WEBrick Webサーバを追加するため、Redmineプロジェクト・ディレクトリに「Gemfile.local」ファイルを作成します。
[redmine@localhost redmine-5.0.3]$ vi Gemfile.local

【記載内容】
gem "webrick"

[redmine@localhost redmine-5.0.3]$
Redmineプロジェクトに、WEBrick Webサーバを追加します。
[redmine@localhost redmine-5.0.3]$ bundle install --without development test
etching gem metadata from https://rubygems.org/.........
Resolving dependencies...
~(省略)~
Using sanitize 6.0.0
Fetching webrick 1.7.0
Installing webrick 1.7.0
Bundle complete! 44 Gemfile dependencies, 75 gems now installed.
Gems in the groups 'development' and 'test' were not installed.
Use `bundle info [gemname]` to see where a bundled gem is installed.
[redmine@localhost redmine-5.0.3]$
WEBrick Webサーバへのアクセスは、デフォルトでは「TCPの3000番ポート」を使用します。このため、アクセスを一時的に許可するため、firewalldに規則を追加します。
[redmine@localhost redmine-5.0.3]$ sudo firewall-cmd --add-port=3000/tcp --zone=public
[redmine@localhost redmine-5.0.3]$ sudo firewall-cmd --reload
[redmine@localhost redmine-5.0.3]$ sudo firewall-cmd --list-all
public (active)
  target: default
  icmp-block-inversion: no
  interfaces: ens33
  sources:
  services: cockpit dhcpv6-client http ssh
  ports: 3000/tcp  <-- 追加した規則(TCPの3000番ポートを許可)
  protocols:
  forward: yes
  masquerade: no
  forward-ports:
  source-ports:
  icmp-blocks:
  rich rules:
[redmine@localhost redmine-5.0.3]$
WEBrick Webサーバを実行します。
[redmine@localhost redmine-5.0.3]$ bundle exec rails server -u webrick -e production
=> Booting WEBrick
=> Rails 6.1.7 application starting in production http://0.0.0.0:3000
=> Run `bin/rails server --help` for more startup options
[2022-11-06 10:06:27] INFO  WEBrick 1.7.0
[2022-11-06 10:06:27] INFO  ruby 3.1.2 (2022-04-12) [x86_64-linux]
[2022-11-06 10:06:27] INFO  WEBrick::HTTPServer#start: pid=42496 port=3000
~(省略)~
Webブラウザを使用して、以下のURLにアクセスします。
URL: http://<サーバのIPアドレス>:3000/
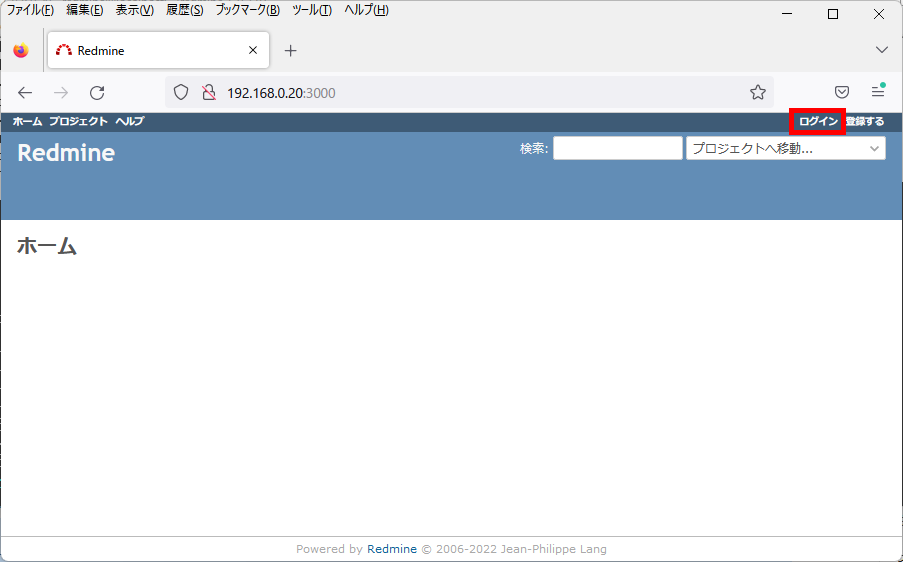
以下のページが表示されますので、右上の「ログイン」をクリックします。
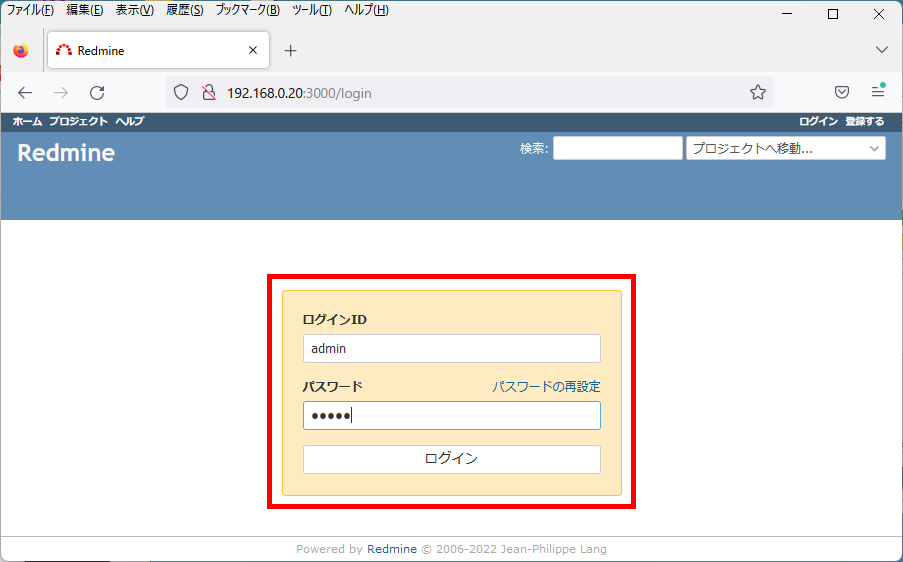
ログイン画面が表示されますので、ユーザー名およびパスワードを入力し、「ログイン」をクリックします。デフォルトの管理者ユーザー名およびパスワードは、「admin」、「admin」です。
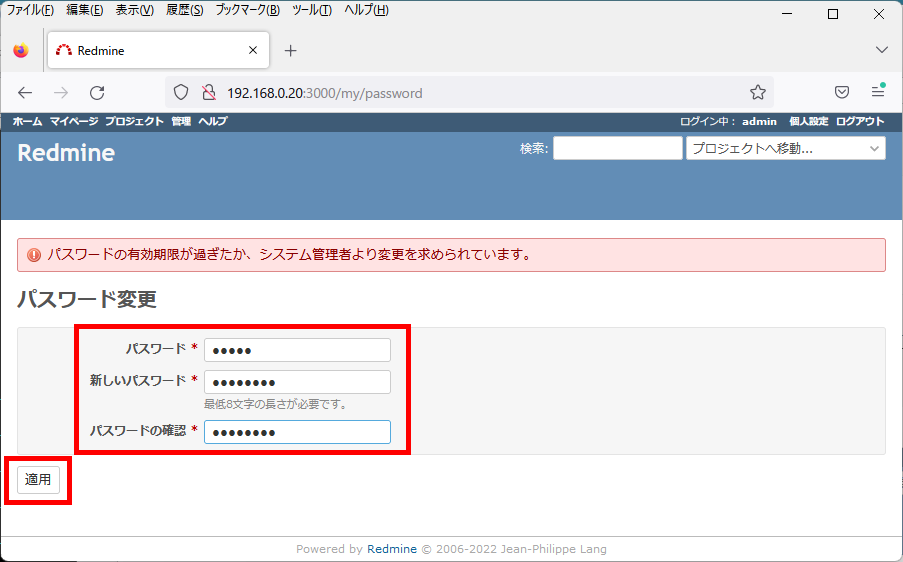
以下のように初期パスワードの変更画面が表示されますので、新しいパスワードを入力し、「適用」をクリックします。
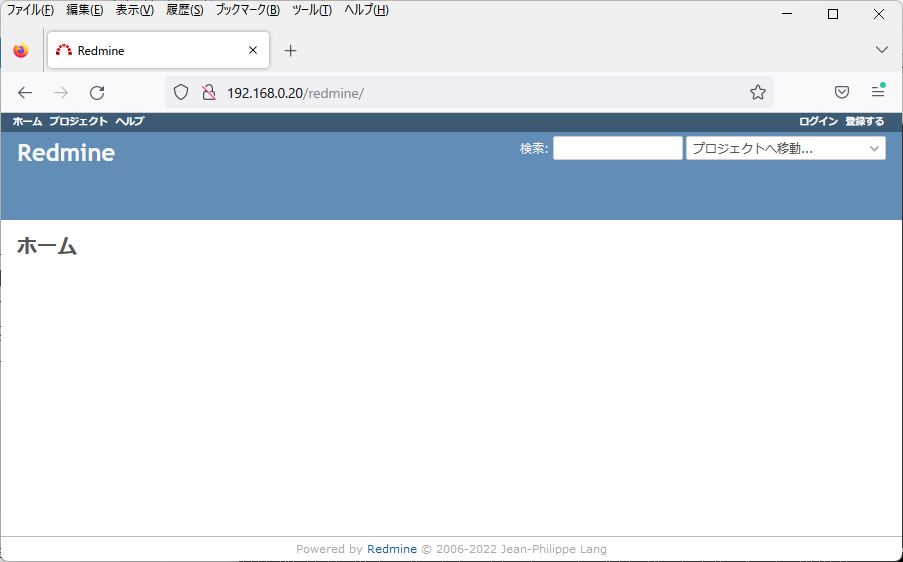
以下の画面が表示されれば、インストールは完了です。

Apacheサーバ環境の構成
Apache2サーバのインストール
Apache2サーバをインストールします。
[redmine@localhost redmine-5.0.3]$ cd ~
[redmine@localhost ~]$ sudo dnf install httpd httpd-devel
[redmine@localhost ~]$
インストールしたバージョンを確認します。
[redmine@localhost ~]$ httpd -v
Server version: Apache/2.4.51 (AlmaLinux)
Server built:   Mar 21 2022 00:00:00
[redmine@localhost ~]$
passengerのインストール
本文章では、Apache2サーバでRedmineを動作させるため、「Phusion Passenger」ライブラリを使用します。
【備考】
詳細なインストール方法については、Phusionの公式ホームページに記載されていますので、ご参照ください。
「passenger」のインストールを行います。
[redmine@localhost ~]$ gem install passenger
Fetching passenger-6.0.15.gem
Building native extensions. This could take a while...
Successfully installed passenger-6.0.15
Parsing documentation for passenger-6.0.15
Installing ri documentation for passenger-6.0.15
Done installing documentation for passenger after 47 seconds
1 gem installed
[redmine@localhost ~]$
「passenger-install-apache2-module」を実行した際に警告が表示されますので、「/opt/redmine」のパーミッションを記載されている通りに変更します。
[redmine@localhost ~]$ chmod o+x /opt/redmine
[redmine@localhost ~]$
Apacheサーバ用のモジュールをビルドします。モジュールのビルドには、しばらく時間がかかります。
最後に表示されるLoadModuleから始まる文字列は、Apacheサーバの設定で必要になります。
【注意】
メモリ容量が不足していると以下のようなエラーが発生しビルドに失敗します。
失敗した場合は、メモリ容量を増加した後、またはSWAP領域を増加した後、再実行してください。
【ビルドエラー例】
src/agent/Core/SpawningKit/Handshake/WorkDir.h:58:22: 備考: ‘buf’ はここで宣言されています
   58 |                 char buf[PATH_MAX + 1];
      |                      ^~~
c++: 致命的エラー: 強制終了 signal terminated program cc1plus
コンパイルを停止しました。
rake aborted!
[redmine@localhost ~]$ passenger-install-apache2-module
Welcome to the Phusion Passenger Apache 2 module installer, v6.0.15.
This installer will guide you through the entire installation process. It
shouldn't take more than 3 minutes in total.
Here's what you can expect from the installation process:
1. The Apache 2 module will be installed for you.
2. You'll learn how to configure Apache.
3. You'll learn how to deploy a Ruby on Rails application.
Don't worry if anything goes wrong. This installer will advise you on how to
solve any problems.
Press Enter to continue, or Ctrl-C to abort.
1 <-- [1]を入力
--------------------------------------------
Which languages are you interested in?
Use <space> to select.
If the menu doesn't display correctly, press '!'
> (*) Ruby <-- [Ruby]を選択
( ) Python
( ) Node.js
( ) Meteor
--------------------------------------------
必要なソフトウェアの存在確認行われますので、不足している場合は、
インストールした後に再実行してください。
Checking for required software...
* Checking for C compiler...
Found: yes
Location: /usr/bin/cc
* Checking for C++ compiler...
Found: yes
Location: /usr/bin/c++
~(省略)~
--------------------------------------------
Checking whether there are multiple Apache installations...
Only a single installation detected. This is good.
--------------------------------------------
Compiling and installing Apache 2 module...
~(省略)~
--------------------------------------------
Almost there!
Please edit your Apache configuration file, and add these lines:
LoadModule passenger_module /opt/redmine/passenger-6.0.15/buildout/apache2/mod_passenger.so
<IfModule mod_passenger.c>
PassengerRoot /opt/redmine/passenger-6.0.15
PassengerDefaultRuby /opt/redmine/.rbenv/versions/3.1.2/bin/ruby
</IfModule>
After you restart Apache, you are ready to deploy any number of web
applications on Apache, with a minimum amount of configuration!
Press ENTER when you are done editing.Apache2サーバの設定を行う際に必要になる情報は、以下のコマンドでも確認することができます。
[redmine@localhost ~]$ passenger-install-apache2-module --snippet
LoadModule passenger_module /opt/redmine/passenger-6.0.15/buildout/apache2/mod_passenger.so
<IfModule mod_passenger.c>
  PassengerRoot /opt/redmine/passenger-6.0.15
  PassengerDefaultRuby /opt/redmine/.rbenv/versions/3.1.2/bin/ruby
</IfModule>
[redmine@localhost ~]$
Apache2サーバの設定
「passenger」用の設定ファイル(/etc/httpd/conf.d/redmine.conf)を作成します。
[redmine@localhost ~]$ sudo vi /etc/httpd/conf.d/redmine.conf

【記載内容】
#
# Passengerのモジュールをロード
#
LoadModule passenger_module /opt/redmine/.rbenv/versions/3.1.2/lib/ruby/gems/3.1.0/gems/passenger-6.0.15/buildout/apache2/mod_passenger.so

#
# Passengerのモジュールをロード
#
<IfModule mod_passenger.c>
    PassengerRoot /opt/redmine/.rbenv/versions/3.1.2/lib/ruby/gems/3.1.0/gems/passenger-6.0.15
    PassengerDefaultRuby /opt/redmine/.rbenv/versions/3.1.2/bin/ruby
</IfModule>

#
# Passengerにより追加されるHTTPヘッダを削除
#
Header always unset "X-Powered-By"
Header always unset "X-Runtime"

ServerName www.ingenious.jp

<Directory /opt/redmine/redmine-5.0.3>
    AllowOverride None
    Require all granted
</Directory>

<Directory /opt/redmine/redmine-5.0.3/public>
    Options FollowSymLinks
    AllowOverride All
    Require all granted
</Directory>

Alias /redmine /opt/redmine/redmine-5.0.3/public

<Location /redmine>
    PassengerBaseURI /redmine
    PassengerAppRoot /opt/redmine/redmine-5.0.3
</Location>

[redmine@localhost ~]$
Redmineプロジェクト・ディレクトリのパーミッション変更
Apache2サーバからRedmineのプロジェクト・ディレクトリへアクセスできるようにパーミッションを変更します。
Apache2サーバの実行ユーザーを確認します。
[redmine@localhost ~]$ cat /etc/httpd/conf/httpd.conf

# User/Group: The name (or #number) of the user/group to run httpd as.
# It is usually good practice to create a dedicated user and group for
# running httpd, as with most system services.
#
User apache
Group apache

[redmine@localhost ~]$
Redmineのプロジェクト・ディレクトリへアクセスできるように、「/opt/redmine」ディレクトリのパーミッションを変更し、「redmine」グループへ「apache」ユーザーを追加します。
[redmine@localhost ~]$ sudo chmod 770 /opt/redmine
[redmine@localhost ~]$ sudo usermod -aG redmine apache
[redmine@localhost ~]$
Apache2サーバを再起動します。
[redmine@localhost ~]$ sudo systemctl restart httpd.service
[redmine@localhost ~]$
動作確認
Webブラウザを使用して、以下のURLにアクセスします。
URL: http://<サーバのIPアドレス>/redmine/
以下のように、Redmineのページが表示されることを確認します。
以上で終了です。